
Setting Up Tidio Ai Chatbots || Tidio chatbot 2024. In today’s fast-paced digital world, offering real-time communication via chatbots is essential for businesses looking to enhance customer engagement and support. One of the most popular chatbot platforms is Tidio, offering easy-to-use features for building chatbots that can automate customer interactions. If you’re new to Tidio or are looking for a step-by-step guide to setting up chatbots, you’re in the right place.
In this guide, we will walk you through the entire Tidio chatbot setup process. By the end, you’ll be able to build customized bots that can enhance user experience, automate tasks, and help your business grow.

Why Use Tidio for Your Business?
Before we jump into the setup, it’s worth noting why Tidio is an excellent choice for chatbot solutions:
- User-friendly Interface: Tidio offers an intuitive drag-and-drop editor, making it accessible for beginners.
- Customizable Templates: You can either use pre-built chatbot templates or create bots from scratch to meet your specific needs.
- Powerful Features: With triggers, actions, and conditions, Tidio chatbots can manage tasks like capturing leads, answering frequently asked questions, and much more.
Step-by-Step Tidio Chatbot Setup Guide | Tidio Ai Chatbot

Let’s dive into setting up your chatbot using Tidio. The process involves building a chatbot flow, defining actions, and testing your bot to ensure it’s ready to handle customer interactions.
1. Accessing the Tidio Chatbots Editor
To get started, you’ll need to access the chatbot editor:
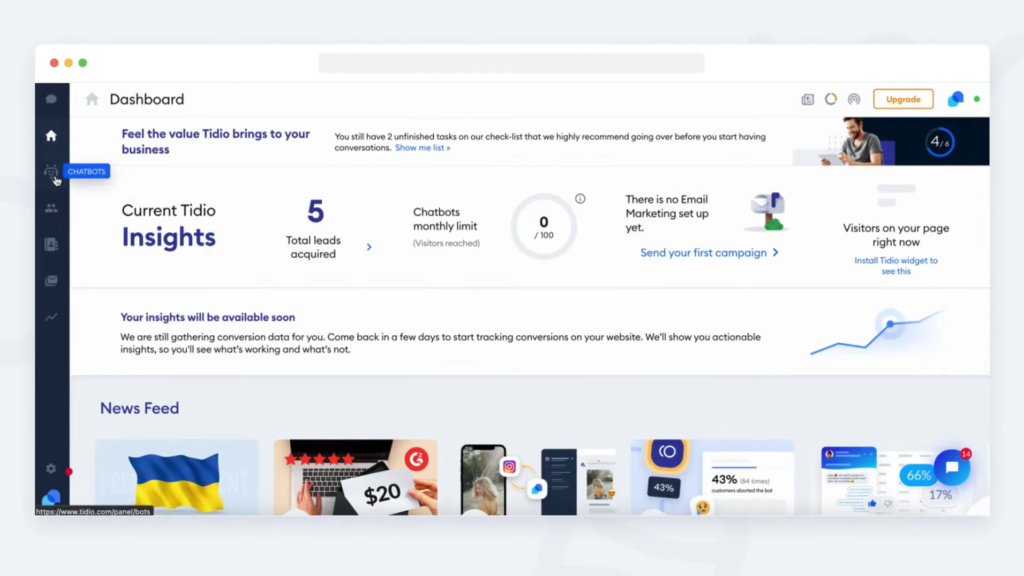
- On the Tidio dashboard, look for the bot icon on the left-hand side of the panel and click on it. This will take you to the chatbot editor.
- Once inside, you’ll have the option to either edit one of the pre-built chatbot templates or create a new bot from scratch.
The chatbot editor is where all the magic happens. It’s designed to help you create conversational flows by dragging and connecting different elements.
2. Understanding the Structure of Chatbot Flows
In Tidio, chatbots are structured like maps that dictate the flow of a conversation. This map consists of three essential components, known as nodes:
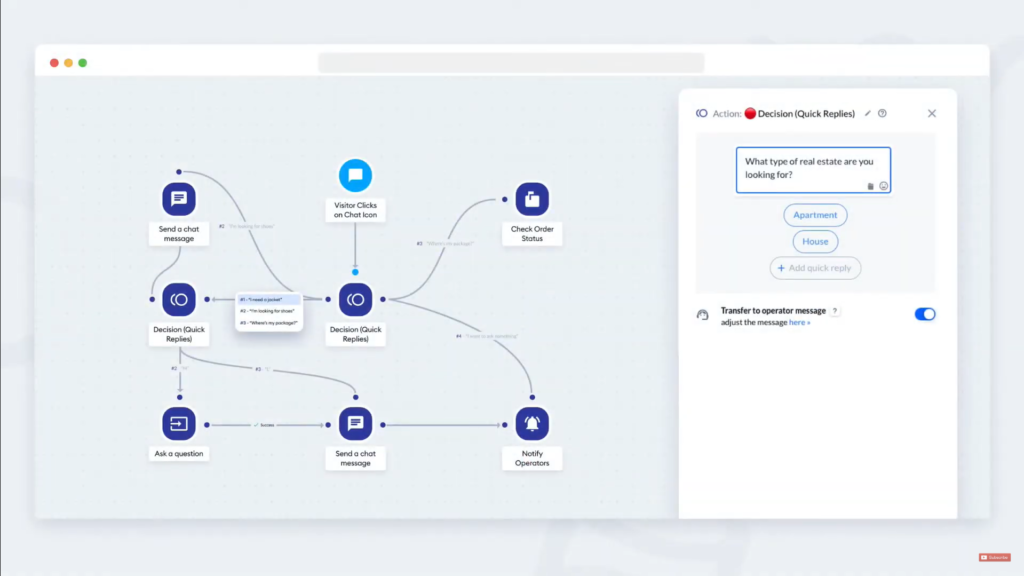
- Triggers: These define when the chatbot should start interacting with the visitor.
- Actions: These tell the chatbot what to do next, such as sending a message or collecting data.
- Conditions: These help filter out specific actions depending on the visitor’s input or behavior.
Let’s explore each of these components in detail:
3. Triggers: Initiating the Chatbot
Triggers are events that cause the chatbot to start. Tidio offers several types of triggers, and understanding them is essential to ensure your bot activates at the right moment. Triggers are divided into three main categories:
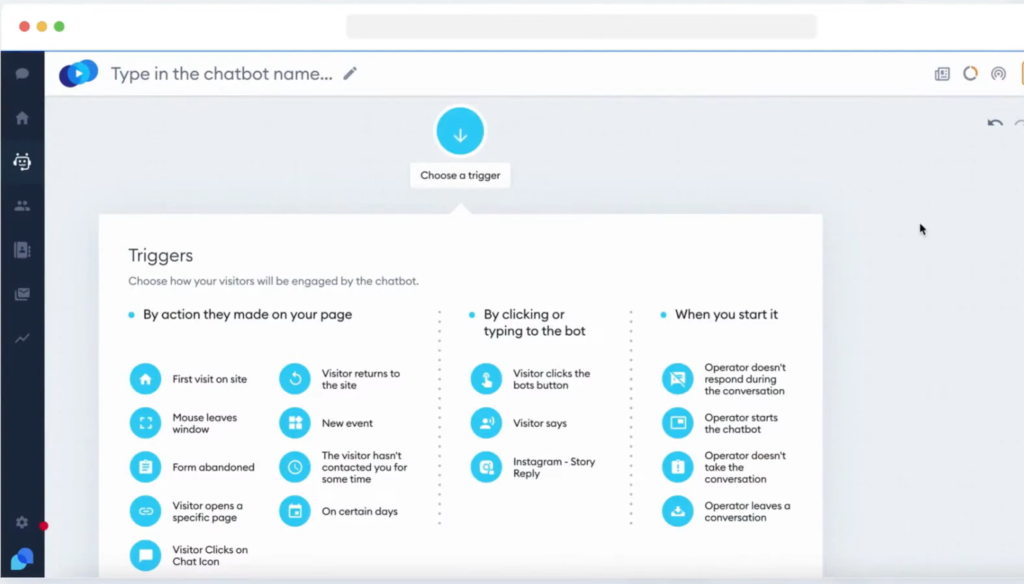
- Launched by Visitors: These are user-initiated triggers, such as when a visitor lands on a particular page or when a returning customer revisits.
- Launched by Operators: These can be controlled by customer service representatives or automated systems.
- Button/Typing-Based: This type of trigger activates when users click a button or start typing into the chatbot interface.
Sometimes, triggers might fire more often than needed, leading to repetitive actions. In Tidio, you can limit the number of times a trigger is fired for each visitor, ensuring the chatbot remains efficient without being too intrusive.
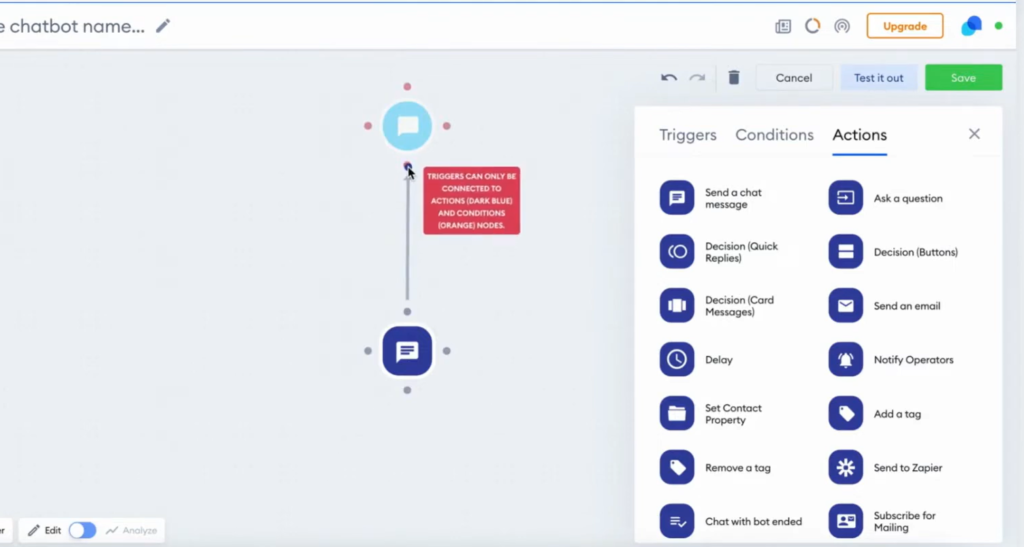
4. Actions: Defining What the Bot Should Do
Once a trigger is set, the next step is to tell the chatbot what action to take. Actions could include:
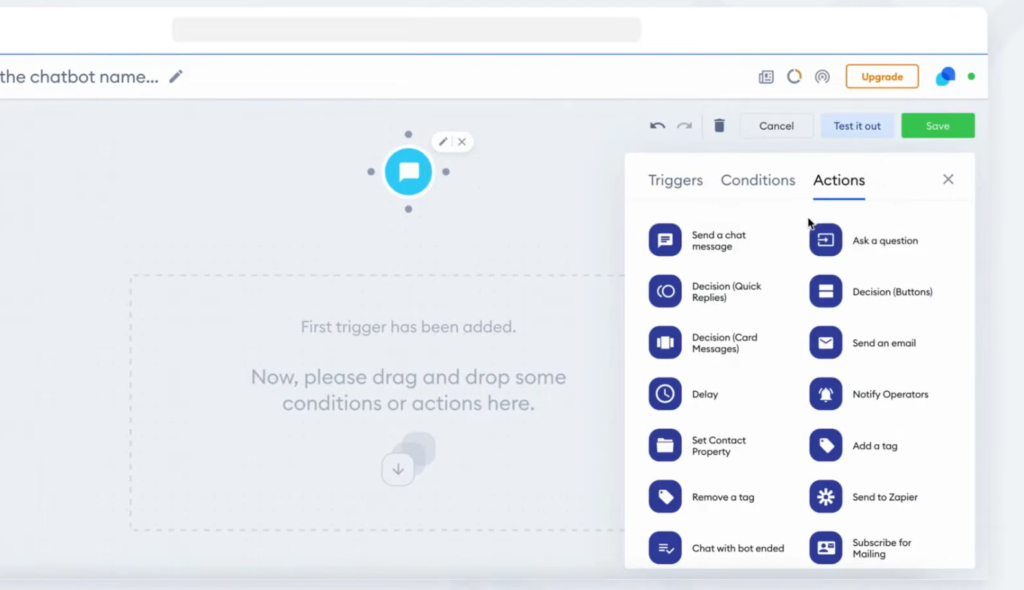
- Sending a welcome message
- Asking a question
- Displaying a product recommendation
To connect a trigger to an action:
- Drag the action node to your flow and connect it to the trigger.
- Define what the action should do. For example, if the action is to send a message, you can customize the text your chatbot will send to the visitor.
The actions must follow a logical sequence. If your flow isn’t connected correctly, Tidio will display an error message to help you fix the issue. It’s important to remember that the flow can’t move backward; the conversation must follow a forward-moving logic.
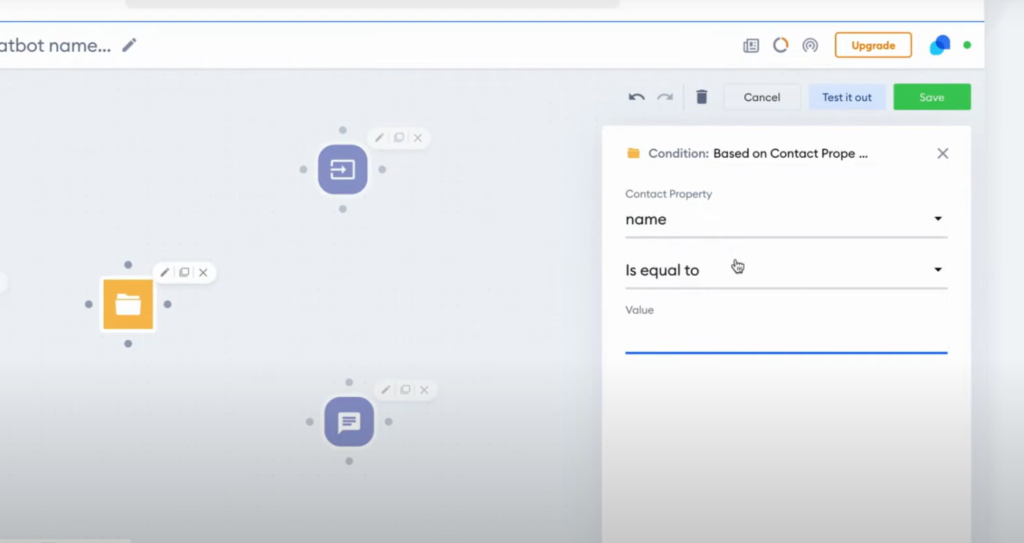
5. Conditions: Customizing the Flow Based on Visitor Input
In some cases, you’ll want the chatbot to follow different paths depending on how a visitor responds. This is where conditions come into play. Conditions allow you to branch out the conversation and personalize the interaction.

For example, imagine you want to check if the visitor has provided their name:
- Add a condition node to your flow.
- Define the condition (e.g., whether the visitor has provided their name).
- From the condition, create two paths: a yes path if the visitor provided their name, and a no path if they didn’t.
If the visitor hasn’t provided a name, the bot can ask for it. Here’s how you can do this:
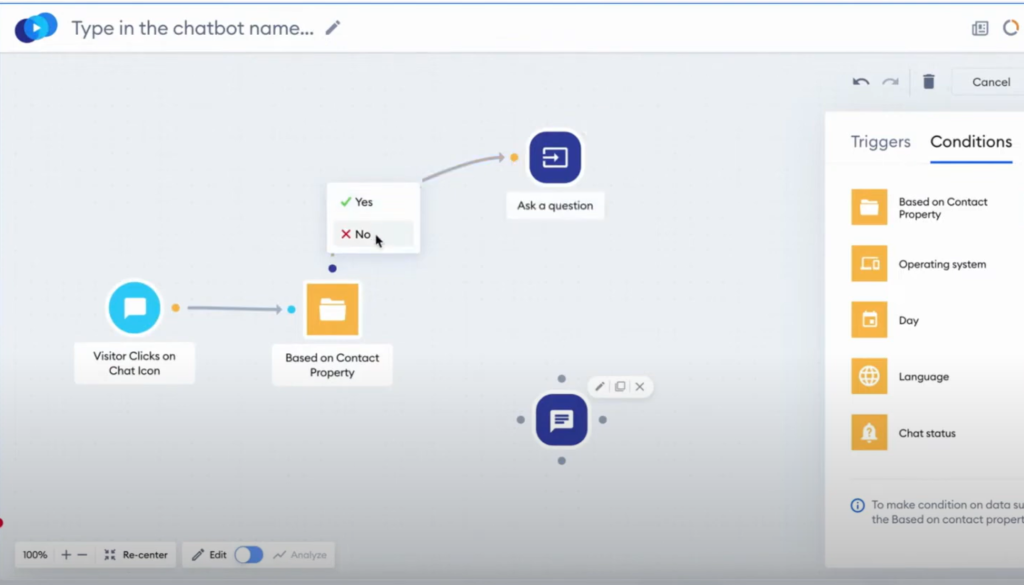
- Pull a “no” path from the condition.
- Add an action that prompts the visitor to input their name.
- Use validation to ensure the input matches the format of a name.
- Save the name as a contact property so that you can use it later.
On the other hand, if the visitor already provided their name, the chatbot can simply continue the conversation and even include the visitor’s name in the next message. Tidio allows you to use saved contact properties dynamically in messages, making conversations more personalized and engaging.
6. Testing Your Chatbot
Once your chatbot flow is complete, it’s crucial to test everything to ensure it works smoothly. To test your bot:
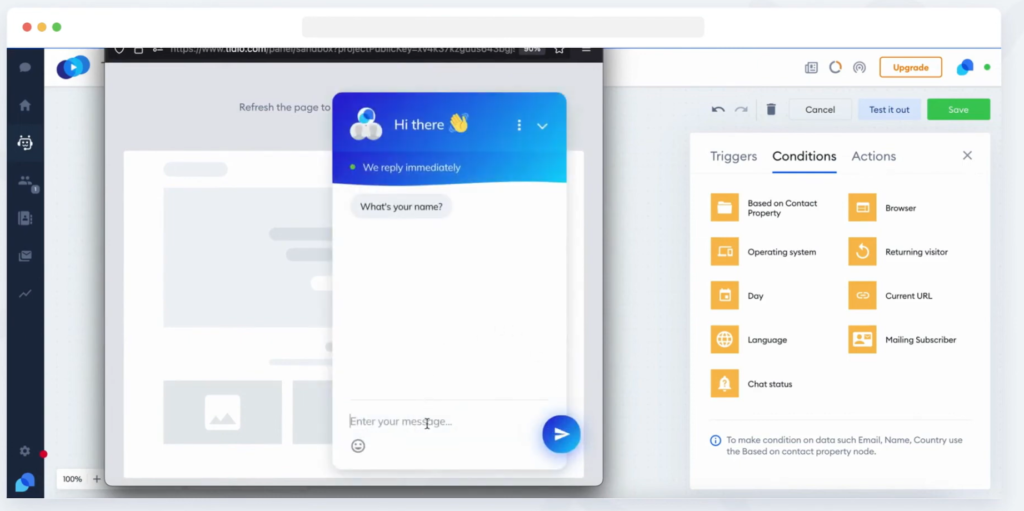
- Click on the Test Bot button in the chatbot editor.
- A new window will open where you can simulate the chatbot interaction.
During testing, you’ll see the flow in action. For instance, if the bot is programmed to ask for the visitor’s name, type in a name and observe how the bot responds. Ensure the chatbot is handling the conversation as expected, including using contact properties where appropriate.
7. Saving and Deploying Your Chatbot
When you’re satisfied with your chatbot’s flow, it’s time to save and deploy it:
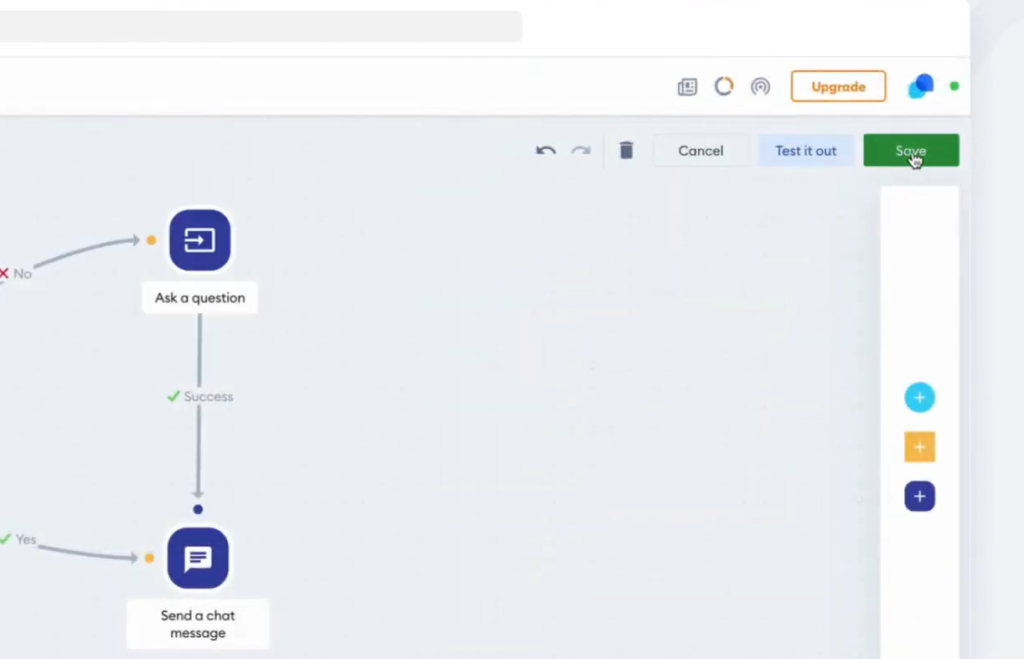
- Click on the Save button in the upper-right corner of the editor.
- Name your chatbot and define its goal. Tidio uses this information to provide better chatbot recommendations in the future.
Once saved, your chatbot will be ready to go live! You can access it anytime from the My Chatbots section in Tidio and make adjustments as necessary.
Best Practices for Tidio Chatbot Setup
Setting up a chatbot is just the beginning. To get the most out of Tidio, here are some best practices to keep in mind:
- Keep it Simple: Avoid overly complex flows that might confuse visitors. Focus on simplicity and clear paths.
- Personalize: Use contact properties to make the conversation feel more human and personalized.
- Test Regularly: As your chatbot evolves, regularly test its functionality to ensure there are no issues.
- Monitor Performance: Use Tidio’s analytics to track the performance of your chatbots and make adjustments based on real user data.
Conclusion
Tidio offers a powerful yet easy-to-use chatbot editor that helps businesses automate conversations, enhance customer engagement, and drive conversions. With this detailed guide, you should now have a strong understanding of how to set up a chatbot using Tidio’s platform. From triggers to actions and conditions, the process is straightforward and customizable to your needs.
If you’re ready to supercharge your customer service with automation, Tidio’s chatbot setup is an excellent place to start.